Logging in with SSH Keys
Using ssh keys to login to the HPC ensures passwordless logins
What are SSH Keys?
An SSH key is essentially a form of secure identification between a server and a client(your computer, in this case). In Layman’s terms, this authentication works because data is encrypted using a client’s public key. For the data/communication between a server and client to be understood by that client, the incoming data is decrypted using the client’s unique private key. This type of authentication is more secure than password authentication, as well as more convenient.
Creating an SSH Key Pair
Mac & Linux Users
To create an SSH-key pair, open your terminal and input the command ssh-keygen -b 4096 -t rsa. The -b 4096 stands for the bit-size, and the rsa specifies the type of key created. You’ll be asked to input a passphrase–this is entirely optional, and you can just press enter to bypass this.
Your terminal will ask you which directory to put your key-pair in. It’s best to leave it as default.
Once you have finished the previous step, there should be two keys within the directory–one that has an ending of .pub–this is your public key. You will share this with the HPC. The other key is your private key–never share it to anyone or to any network.
Windows Users
There are two ways of generating a key-pair–one is through the terminal, and the other is through PuTTY key generator, which should already be installed on your computer if you connect to the HPC with PuTTY.
Terminal
Open a Powershell terminal with administrator privileges. In there, enter the instructions ssh-keygen -t (key type of your choice). Note that ssh-keygen.exe can generate keys with the DSA, RSA, ECDSA, or Ed25519 algorithms. If you leave the key type blank, the terminal automatically generates an RSA key.
There, you should see an output like this:
  Generating public/private (key type) key pair.
  Enter file in which to save the key (C:\Users\username\.ssh\id_rsa)
You can just enter for this–it’s best to keep the default location. After that, you’ll be requested to enter a passphrase–you can just bypass this by pressing enter twice.
After that, you should see that your keys have been saved to the same directory. The terminal will tell you which key is your public key (the key with the .pub at the end).
PuTTY
To create a public key pair with PuTTy, first open the PuTTy key generator application. It should pop up when you search for puttygen.
Once you click on the application, you should be seeing this:
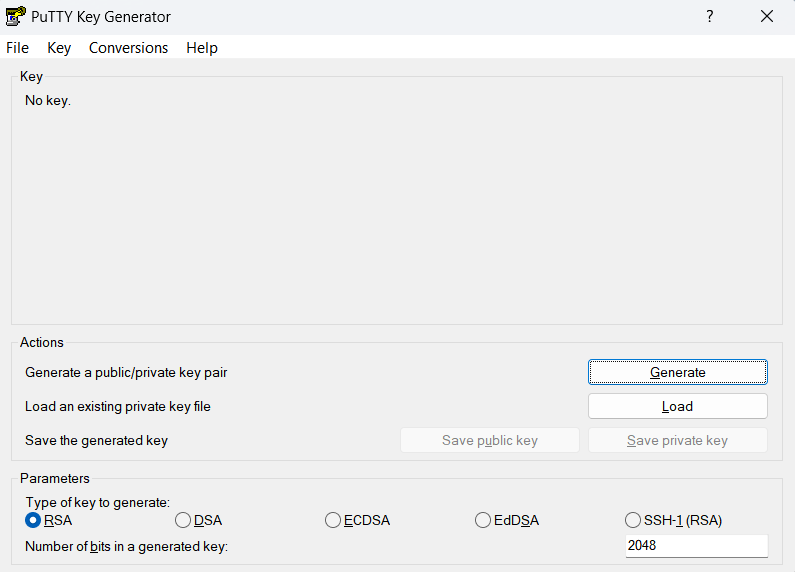
To generate your keys, simply click on the “Generate” button. If the bar isn’t progressing, move your mouse all around the application–this should move the bar. Now, you should see this screen:
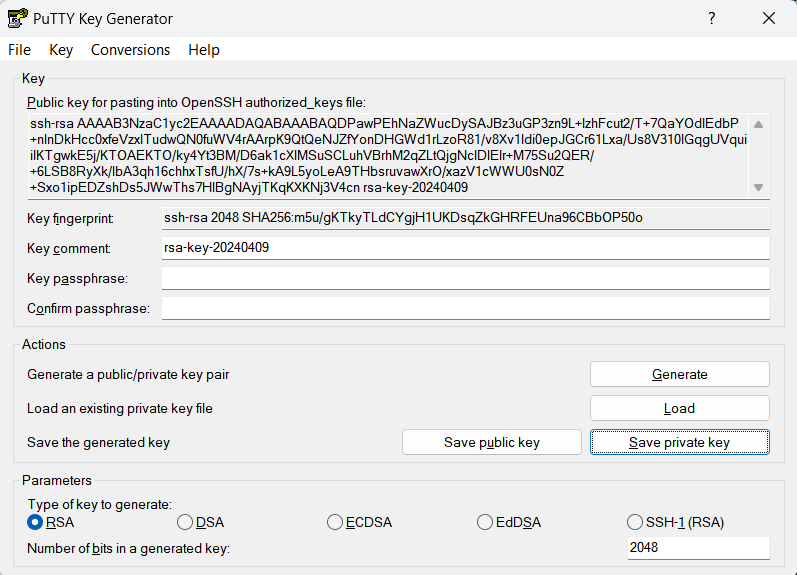
Now, click on the highlighted “Conversions” tab and click “Export OpenSSH key”. This generates your private key. It is recommended to store your key in a safe directory, particularly in the default directory mentioned in the other examples in this section:
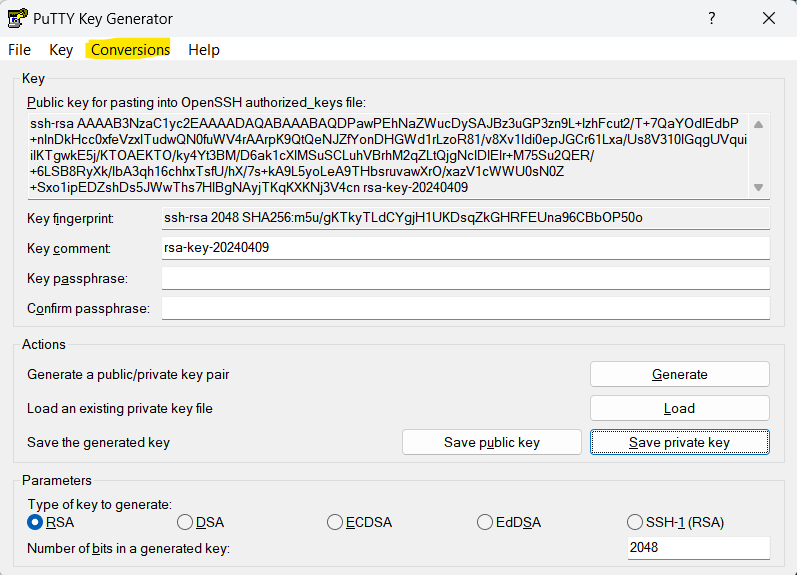
Now, to generate your public key, simply copy the text and paste it all into a text file. Save that text file with the same name as your private key, with .pub added at the end.
Transferring the Public Key to the HPC
Mac & Linux Users
The following step is rather simple–in your terminal, type in ssh-copy-id -i /path/to/id_rsa.pub username@bigblue.memphis.edu
Replace /path/to/id_rsa.pub with the actual directory/directions to your public key. In addition, replace username with your username.
Windows Users
Now that you have copied your public key information, you can open up WinSCP and head to your home directory (should be the first directory you’re in). We need to go into the .ssh folder of your home directory, which may be hidden–to find it, simply click on “Find Files” and, in the bar labeled “File Mask”, put in “authorized_keys.” Make sure you’re in the right directory (highlighted). Click Start. You should see three files–an id_rsa file, an id_rsa.pub file, and an authorized_keys file. Click on the authorized keys file.
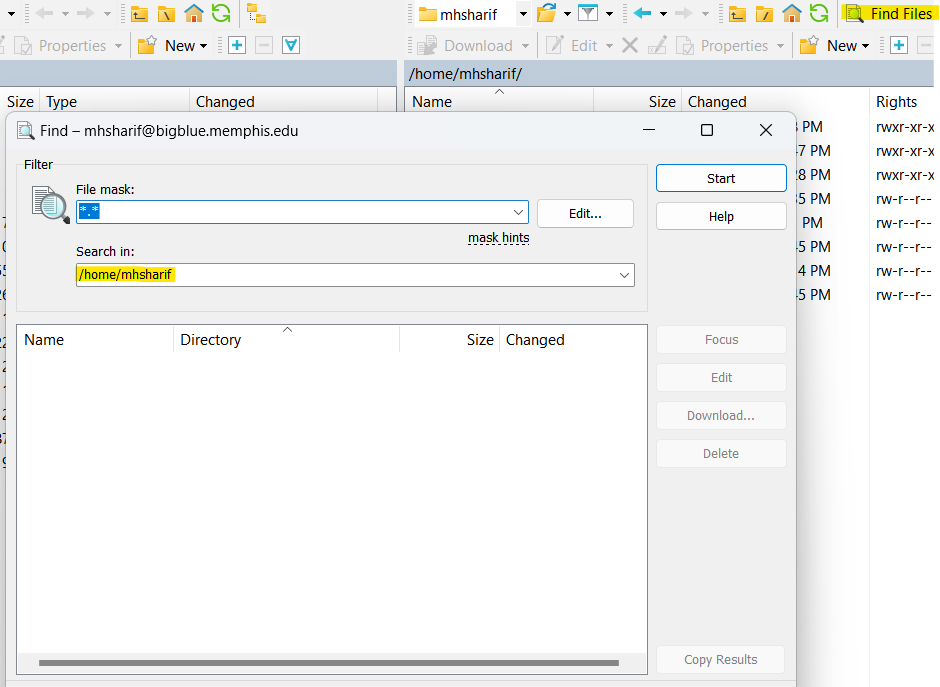
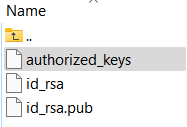
Open up a notepad/code editor of your choice. Now, you’ll see a block of text within the authorized keys file–simply go two spaces below it, and paste your public key to the authorized_keys file. Save your change.
With that, you should now be able to login to the HPC without a password, thanks to your ssh key!
*Note that as a Windows User, you can login passwordless with SSH Keys only through your terminal at this moment. To login with your SSH Key, open your terminal and enter in ssh username@bigblue.memphis.edu, with the username replaced with your specific username.